Configure overview
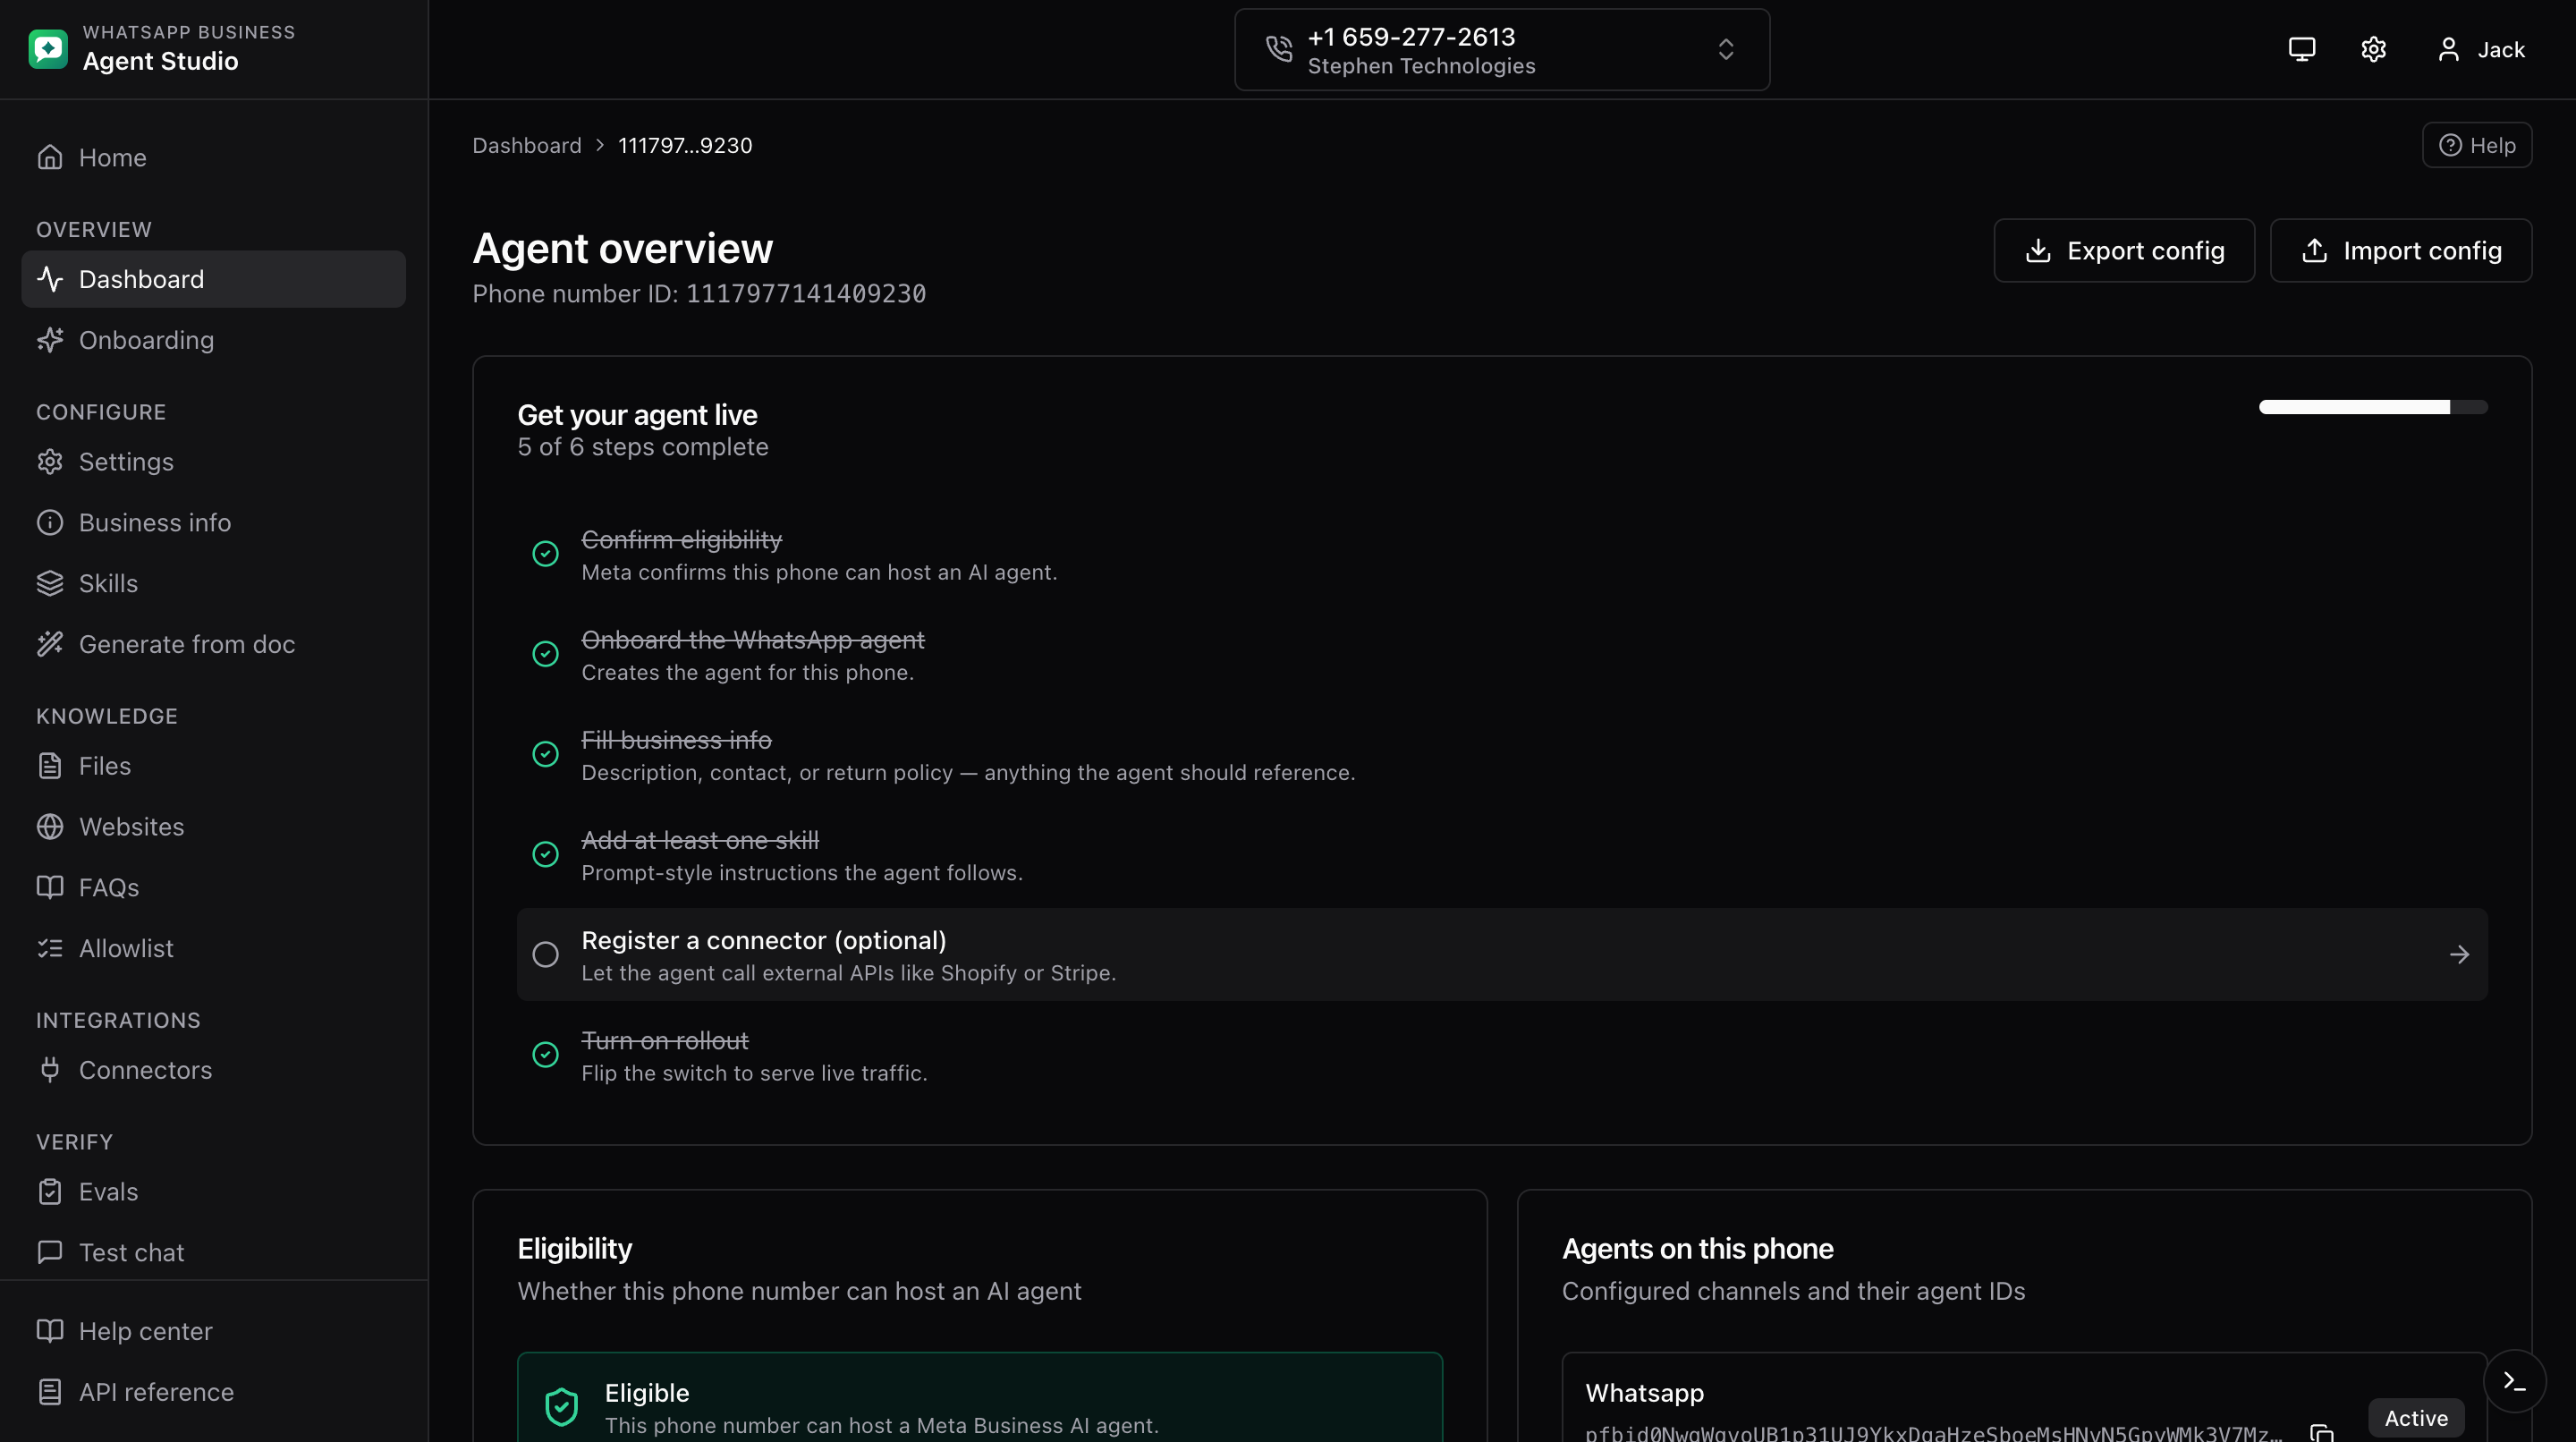
The phone dashboard is the hub for one phone number. This page explains how the layout is structured and how to move between sections.
What you'll do
- Learn the shape of the dashboard.
- Understand the Configure, Ship, and Advanced groups in the sidebar.
- Find the buttons for exporting and importing the whole agent config.
Layout at a glance
- A header at the top holds the theme toggle, the account menu, and the read-only toggle.
- A breadcrumbs row below the header shows Business, WABA, and phone context.
- A sidebar on the left lists every section, grouped into Configure, Ship, and Advanced.
- The main area on the right shows the current section.
Sidebar groups
Configure
- Overview (the current page), with the onboarding checklist.
- Settings, rollout, handoff, follow-up, and AI audience.
- Business info, description, email, and policies.
- Skills, the agent's scenario instructions.
- Knowledge, tabs for files, websites, FAQs, and allowlist.
- Connectors, external APIs the agent can call.
- Generate from doc, AI-assisted drafting from a document.
Ship
- Test, chat with the agent.
- Scenarios, save and replay conversations.
- Evals, run Meta eval cases.
- Agent events, trigger partner-defined events.
- Thread control, release or pass control to a human.
- Webhooks, receive Meta events on a live page.
Advanced
- Playground, a free-form request builder.
- API docs, browse the API reference inside the app.
- AI provider settings, at the top-level Settings page. See AI provider settings.
Overview page contents
The overview shows, from top to bottom:
- The onboarding checklist, when the agent is not fully set up.
- A summary of the phone's eligibility status.
- A list of configured agents on this phone.
- Header actions: Show QR, Export config, and Import config. See Config export and import.
Share a QR to start a chat
The Show QR button in the overview header generates a QR code for the current phone number. Anyone who scans it lands on https://wa.me/{phone number}, which opens WhatsApp on their device and starts a new chat with your business number, no contact save required.
- Click Show QR at the top-right of the overview page.
- A dialog opens with a scannable QR code, the full
wa.meURL below it, and two actions. - Point a phone camera at the QR to test that it opens WhatsApp.
- Click Download PNG to save the QR as an image you can paste into flyers, receipts, storefront signage, email footers, or slide decks.
- Click the copy button next to the URL to grab the link for a website button or a social post.
The QR is generated entirely in your browser, nothing about your phone number is sent to a third-party QR service.
Where to go next
- Agent settings is the natural next stop after onboarding.